Quilting Projects and such
This is a record of many of the quilting projects and other fabric-based creations that I have undertaken over the years. I have tried to remember the circumstances and the particularities of each of these projects. Dates are at best approximate.
The quilts
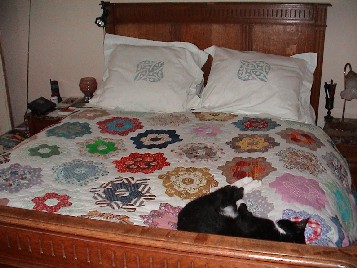
Margot Bazan, and I each made our own quilt, using the same templates and fabrics. She and Judy Springer had rented a wonderful, large apartment in a house on Travis Heights Blvd. This was before Madelaine was born so I'll date this around 1972-73. Their apartment was big and airy and they had more space than furniture. We dumped all of our fabric scraps into the middle of the hardwood floor in the "living room" and used this as our quilting workshop. It was a lot of fun since we had access to tons of different fabrics and we were working on these parallel projects together.
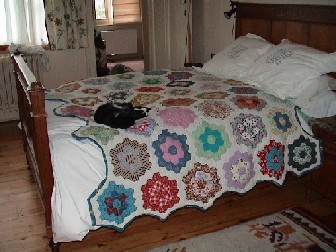
I like the way that the fabrics work together on the individual blocks more than I do the overall effect of the finished quilt. I can remember that I didn't exactly know how to finish off the edges and the prospect of piecing together half-blocks didn't appeal to me at the time. I was rather impatient to finish the top and start the actual quilting. So I settled for a self-border of the backing material. I've noticed that over time this is not a satisfactory solution since the border is torn in several places due to too much stress in the curves.
All of the fabrics were not apt for use on a quilt and have worn more than others. This quilt needs a bit of fixin'.
[Back to Top]
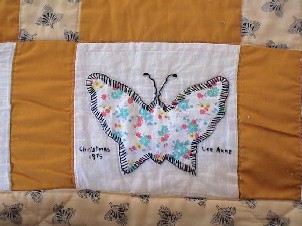
The Butterfly Quilt
Dimensions: Single bed; ______cm. x. _____ cm.
This was an excellent project since it was a real surprise present for my mom. She had started a butterfly appliqué quilt years before I came along. I have a vague recollection that this was one of her projects that she worked on while my dad was overseas.
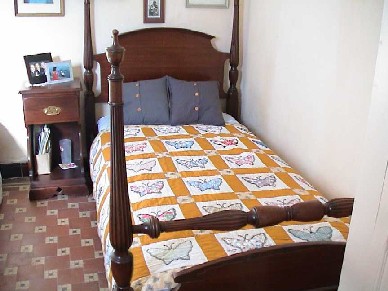
Anyway the only thing that remained of her project was a stack of butterfly blocks that "lived" in the bottom drawer of her chest of drawers. From time to time I would take out the stack and go through them admiring the old-fashioned fabrics.
I somehow felt sorry for these blocks that were never going to see the light of day, until I decided to do something about it. I snitched the stack of blocks from my mother's chest of drawers and came up with a design for a small quilt. I only needed to make up one more block to complete the pattern that I wanted.
The backing fabric, a nice leaf-shaped motif, reappears on the front of the quilt as smaller blocks at the corners of the butterfly blocks. The quilt is dated and signed on the center block of the bottom row. My mom considered this as one of the nicest Christmas presents she had ever received from me
Alec's Quilt
Dimensions: Child's quilt; 125 cm. x.125 cm.This is Alec's quilt made before or soon after his arrival in 1979.
It's a really nice star design in bright red and blue tones. The blue squares,
that set the pattern, are in a very soft velours. The quilt is stuffed
with a very fluffy batting so the overall effect is a very soft, nice to
the touch, quilt. It is machine stitched and hand quilted.
Those who look very hard will find his name quilted in one of the white
border blocks.(Not in the photo, but on the real quilt.)
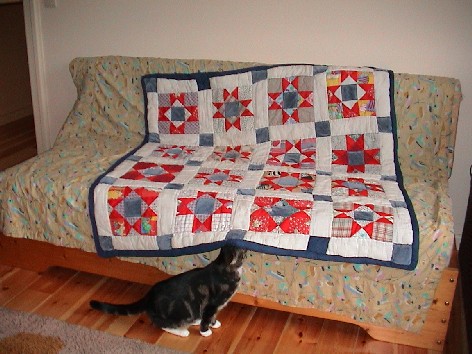
- Margot loved to "get under" any covers or bed clothes. Here she
is inspecting Alec's quilt that I've laid out for the photo session.
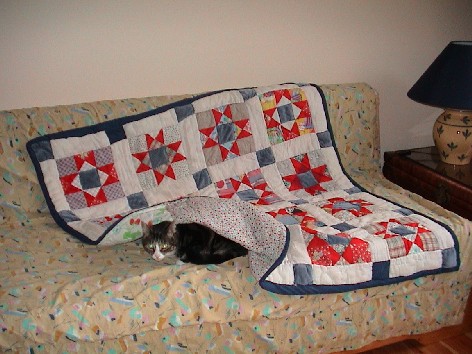
Below she is demonstrating the official kitty hiding posture, while revealing
the quilt's backing of two different materials. (Last photo of Margot,
since she disappeared soon after this and has not come home yet.)
Chloé's Quilt
Dimensions: Double bed; 180 cm. x. 203 cm.I call this Chloé's Quilt because she fell in love with this quilt as a little girl when we were living together in Hoeilaart. In fact, sometimes emotions were so strained that the quilt was the only thing that really tied us together. Since she loved it so much, I gave it to her fairly early on, and when she left the house to build her own little nest with Philippe, she took it with her.
The original quilt was a quick and easy pinwheel design made up of my scrap bag contents. It is machine stitched and machine quilted. One of the nicest things about this quilt is its backing -- a deeply colored, fine floral print.
My Log Cabin Quilt
Dimensions: Double bed; ______cm. x. _____ cm.This is the quilt that I have always wanted to make. I've always
been fascinated by the incredible number of possibilities for assembling
the Log Cabin pattern. This one, "Barnraising", is one of my favorites.
My friend, Josianne , taught quilting classes here in Brussels at the
time when our sons were both attending the Lycée Français
Jean Monet. I was never able to attend her classes because of working
hours, but I enjoyed watching her prepare her classes, and we spent a lot
of time talking needlework.
So, Josianne offered to help me get started on this project.
I knew the pattern I wanted. She taught me how to design the color scheme,
order the swatches, pick out the fabrics, calculate the metrage, etc. This
was a tremendous amount of
work and I don't think that I could have gotten started on this project
without Josianne's help.
This quilt took quite a long time to finish. The advantage of
the Log Cabin pattern is that I could take a block-in-progress in my briefcase
and work on it during my travel time. This allowed me to make continuous
progress. All in all, I estimate that it took me about five years
to complete this one. (Not shown are the matching pillow cases.)
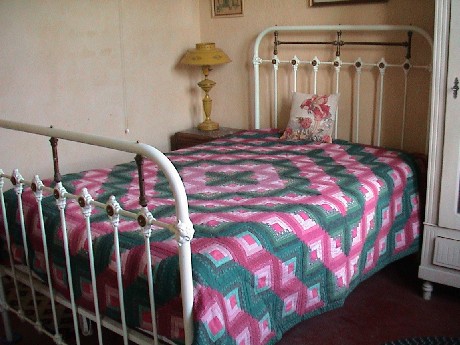
One thing that I really like about this particular design is the color work on the various types of blocks. There are three block types, each of which vary in color value. The center has the lightest blocks, the middle area has the medium blocks, and the outer edges has the darkest blocks.
No quilting is done on this patchwork. The various layers are
tied together by pink yarn ties attached in the middle of each of the blocks,
in the central pink block. The backing fabric is the same as you see for
the border.
[Back to Top]
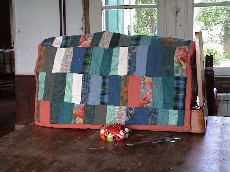
Samurai Sewing Machine Cover
After finishing the Barn Raising quilt, it took me a bit of time before I felt some inspiration to take on another project. However, I had always wanted to have a quilted jacket, and I had a pattern for one. So I went through all of my scraps and came up with a quickly pieced together set of fabrics that I made into a jacket. It was a real disappointment since the overall effect was not at all soft and cuddly as I had hoped but was something more like Samurai armor. I would put the jacket on and not be able to bend my arms!I made the fatal mistake of showing it to Alec, who instantly remarked, "That thing is butt-ugly. You can't wear that. Imagine opening the door with that thing on. People would say 'Where's that nice lady who used to live here that was dressed normally?'"
I got the message, and waited a certain amount of time before cutting
into the jacket. Here's what I came up with...
[Back to Top]
Some Chicken's Table Runner
This was my first attempt at designing a patchwork based on thematic fabrics. Here the theme is "chickens", and this is a project that I just had to get out of my system. What could be done with chicken fabric? Since there was precious little of the fabric (a "fat quarter" is 1/4 of a yard), I had to come up with a small project, so I decided on a table runner. Even this required that I order a supplement for the backing which is the same fabric as the border shown here.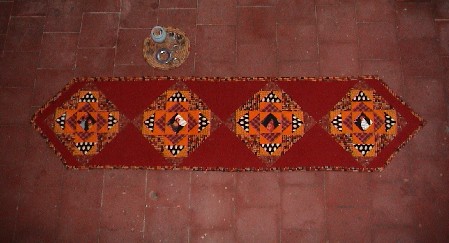
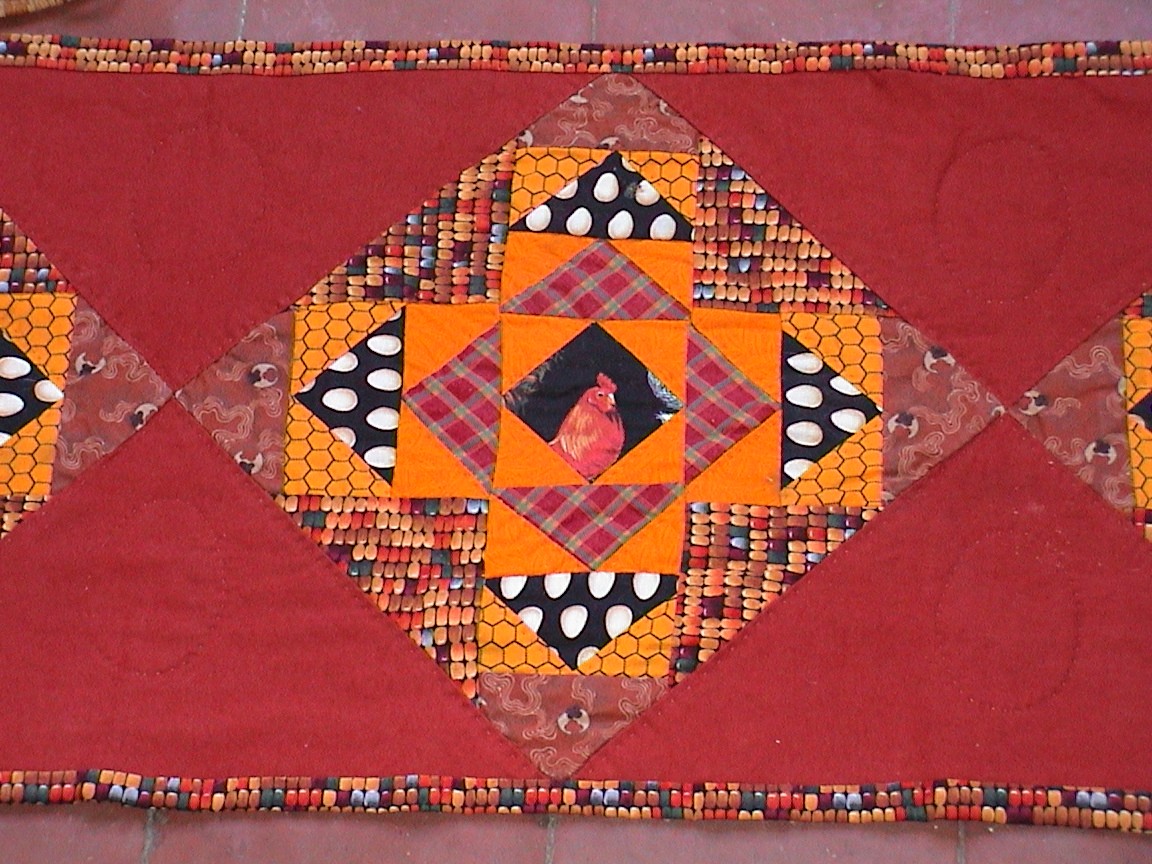
The title "Some Chicken's" is a literary reference to a piece of artwork that Madelaine did when she was about 5 years old. We never did figure out some chicken's "what"...
It's a bit hard to see in the photo, but the large triangles between each figurative block are quilted with an egg shape, going all the way with the chicken/egg theme.
(Since Simon loves chickens so much, I made a pillow out of one of these block for his 2nd birthday.)
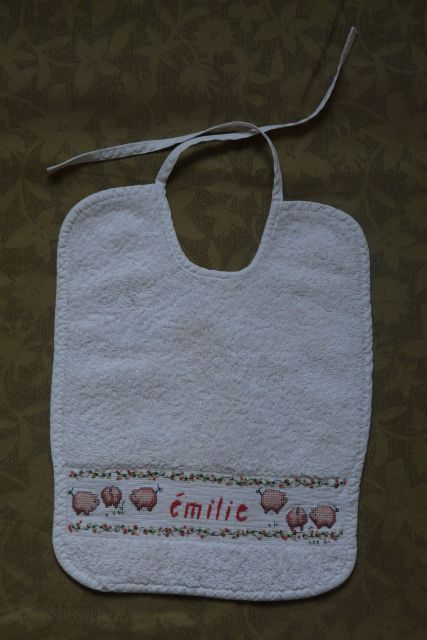
Emilie's Piggie Bib
A bit of embroidery for Emilie. I do these type of bibs regularly for friends,
family, and colleagues.
Emilie's Heart Quilt
Dimensions: Child's quilt; 96 cm. x 136 cm.When Barbara announced that she was expecting, we sat down with the Keepsake Quilting catalog and decided on a style and a pattern that she liked. She selected a Raggedy Hearts pattern and I was intrigued since this was the first time that I seen this technique. What is interesting is the manner in which the individual blocks are sewn together -- the raw seams are turned towards the front of the quilt so that as the quilt is pieced together block by block, the reverse side has the finished appearance while the front looks like a mess. When the entire quilt is pieced together, the raw edges are then snipped giving a fringed effect. After several washes, these fringes ravel together to give a softer finish.
Picking out the fabric for this quilt was a real treat. I went to John Lewis' on Oxford Street in London after a business meeting. Thierry patiently waited in a chair reading while I selected my fabrics and stood in line for what seemed like hours.
While piecing the fabrics together, I could never tell if the quilt was going to look right or not, since the fabrics were a bit brighter than what I was used to working with.
Anyway, total success, as the photo shows.
Emilie's Doll Quilt
Dimensions: Doll quilt; 45 cm. x. 57 cm.I liked Emilie's quilt so much, that I wanted to have one for myself. With the scraps left over from her quilt, I made this doll quilt. Maybe one day she'll notice that this one is just a miniature version of her quilt.
Madelaine & Richard's Wedding Quilt
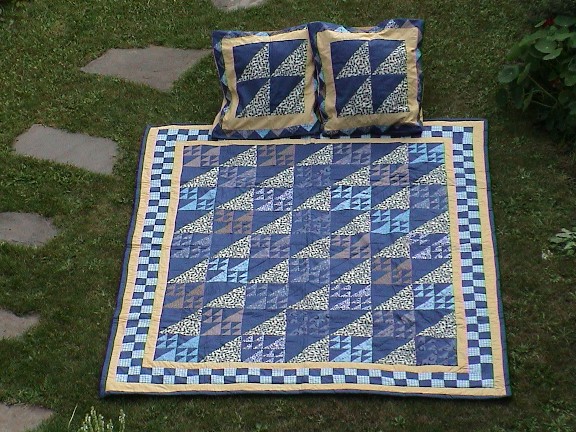
Dimensions: Double bed; 160 cm. x. 197 cm.Madelaine and Richard were married on April 27, 2001 in Austin. It was a wonderful family and friend celebration. (link to their photos goes here.)
After the festivities had died down, I offered to make them a quilt for their wedding present. Using the Internet, I sent them several examples to get an idea of what they liked. Using my new Electric Quilt program, I was able to design something and send them several color examples from which to choose. They selected a Flying Geese pattern in blue and gold tones.
March 2003 -- The quilt is finished and has had its official photo taken. The color scheme has remained the same as the original design but there has been a large variation on the balance between the blue and the yellow.
Here is what the final result gives:
Frogs & Waterlily
I rarely "create" my own designs; most of the time, I just adapt a given pattern or idea that I've seen. Here's my first creation, Frogs & Waterlily. I was so afraid that it would never find a home, but Chloé loves it, and apparently so did her cats (who tried to completely destroy the waterlily and its beads!).

Les Chats de Chloé
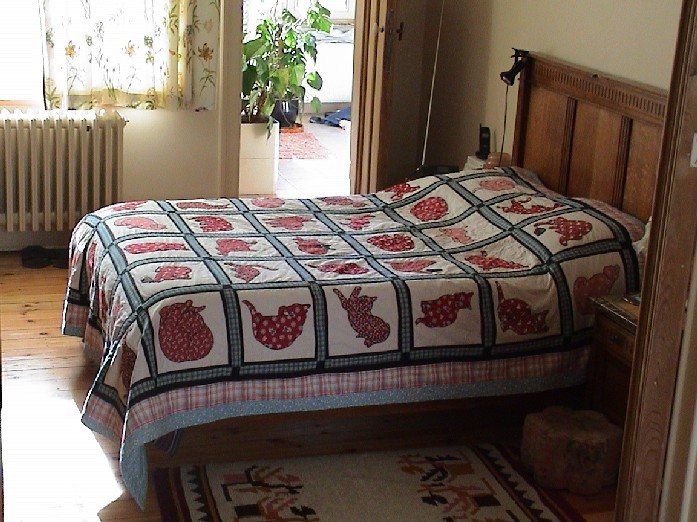
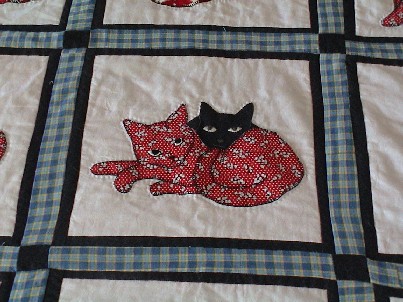
During one of their stays at Heuchin, Chloé thumbed through one of my quilting catalogs and fell in love with a kitty quilt from a book called "Claire's Cats", by Darcy Ashton. With Philou's approval, we elaborated a design based on 35 different cat appliqués and 1930's fabrics. Since each cat shape was unique, there was quite a lot of tracing and cutting, both for the fabric and the fusible material with which the fabric is ironed to the background. I borrowed Gillian's special sewing machine which is equipped with a very realistic appliqué stitch. This was a tremendous help in making a quick progress on the cat blocks.
Finished result...
The centerpiece in honor of Sita and Oscar.
Charlotte's Run, Bunnies, Run!
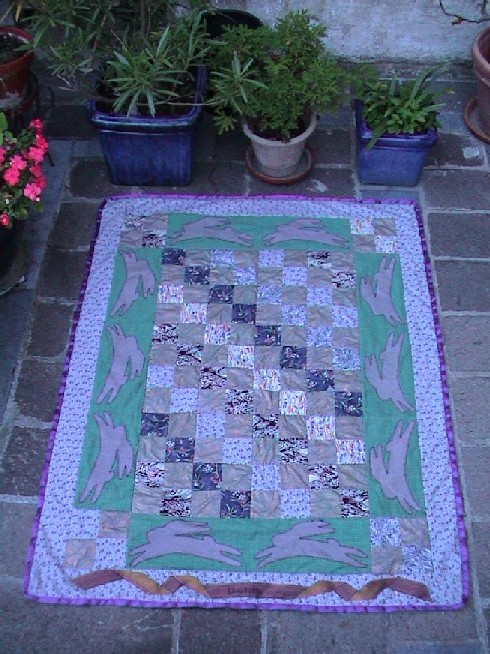
Dimensions: Child's quilt; 104 cm. x. 134 cm.To each child, her own quilt. Charlotte's quilt was inspired from a book on patchwork for children. I liked the running bunnies idea, but didn't like the block-cut rabbits. While visiting my friend, Patti Henson, I spotted a painted silk scarf that she had done that had running bunnies on it. With her permission, I used her bunny pattern, based on soft curves that accentuate the effect of motion. The finished quilt is much more subtle done mainly in lavenders and mauves, with gold highlights. Her name is featured in a gold and purple ribbon at the bottom of the quilt.
Charlotte's bib
Lots of butterflies to greet Charlotte.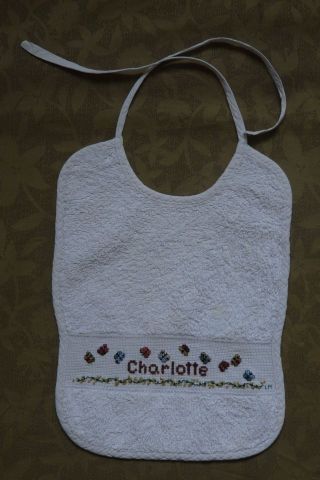
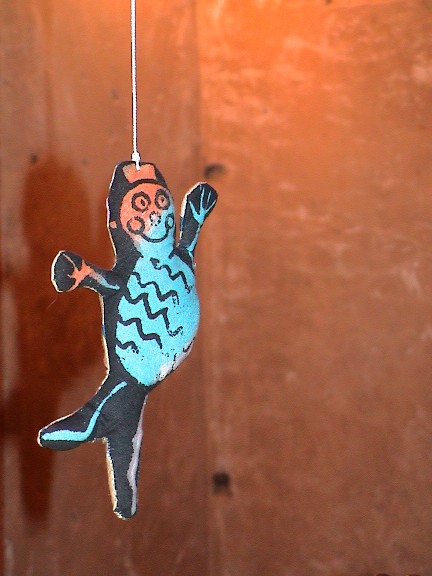
Charlotte's circus mobile
December 2005
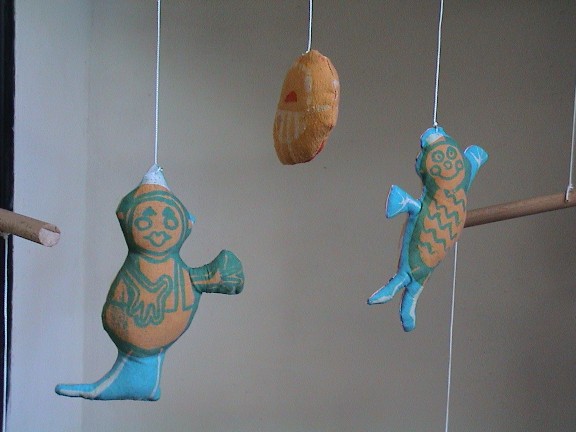
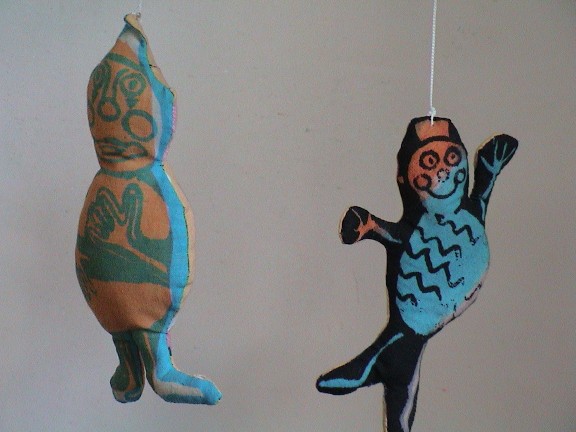
A mobile for Charlotte made from Patti Henson's circus material. I sewed and stuffed the little clown figures and assembled them in a mobile.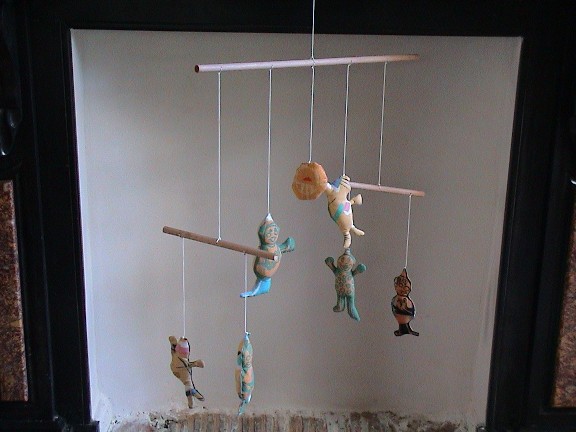
Hen's Son wall hanging
December 2005
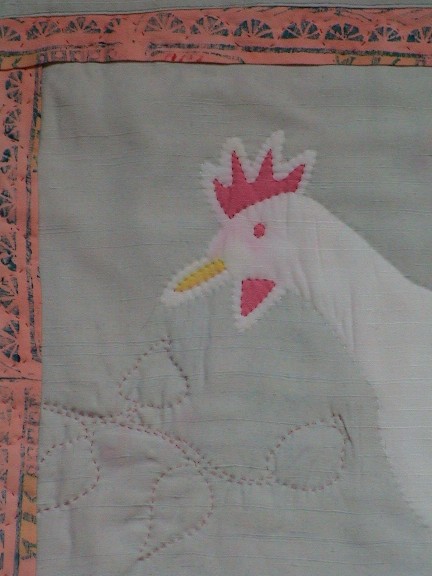
I prefer to make Christmas presents for the kids when I take the time and find the inspiration. For Madelaine and Richard this year, I was inspired by a pile of scrap fabric that Patti Henson gave me that were leftovers from her fabric printing days. Hard to ignore the inimitable Henson-style rooster, which became the Hen's Son wall hanging.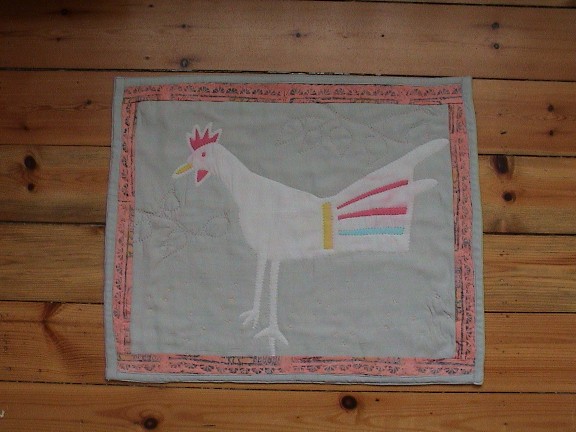
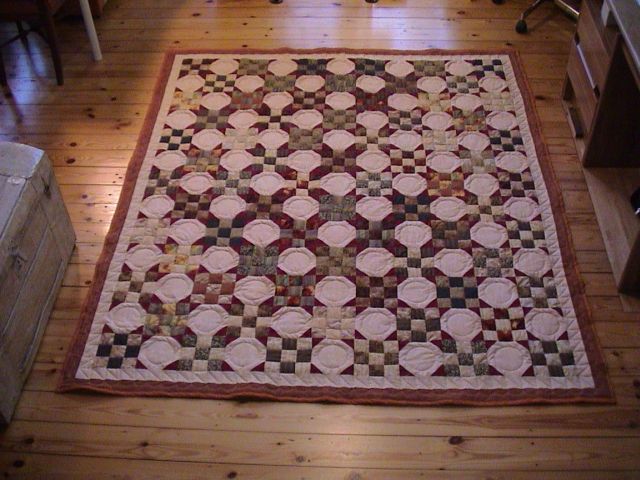
Snowball Nine-Patch Quilt
Dimensions: 188 cm. x. 214 cm.October 2005 - December 2006
The time has come to open discussions with Michel and Barbara concerning the type of quilt that they would like to have. I borrowed some books from my friend, Gillian, to show to Barbara so that she and Michel could select a pattern that suits them. They select the "Snowball Nine-Patch Quilt" from Lynne Edwards' 'Making Scrap Quilts to use it up!' Their color preference is towards warm, autumn colors.I select the fabric for their quilt from a former patchwork shop: browns, yellows, golds. Washed, dried, and ironed, the fabric is now ready to go.
December 2005
First preparation session includes cutting one strip from each of the fabrics and then cutting the strips into blocks, sorting them by value: light or dark. Approx. 2 hours. Assembling the blocks into 9-patches yields 20 patches. Approx. 4 hours. This includes the rather tedious, but necessary task of ironing the 3-block strips, and then the assembled 9-patch. Quilt requires 104 9-patch blocks, therefore, approximately 5 such sessions of 6 hours each.May - October 2006
Very sporadic bursts of activity, resulting in 72 9-patch blocks by now.October - December 2006
Completed the 9-patch blocks, and then the snowball blocks which went quite fast on the electric machine. Assembled the top, shopped for the backing material, which was subsequently pieced together. Two borders added to complete the framing of the quilt. Wonderful wool batting, brought back from my shopping expedition in Berkeley with Madelaine, was incredibly easy to work with. Layers assembled and basted. Quilting was very tedious and physically hard to do because of the weight of the quilt; I used my treadle machine for the quilting. Circles within the snowballs, and "stitch in the ditch" for the nine-blocks gives a "tic-tac-toe" effect on the back of the quilt. The wool batting is quite puffy and gives a lot of relief to the quilt. Triangles quilted on the first border, and scallops on the second.Ouf! Just in time for Christmas...
Poutitoute's Tuffet
December 2006
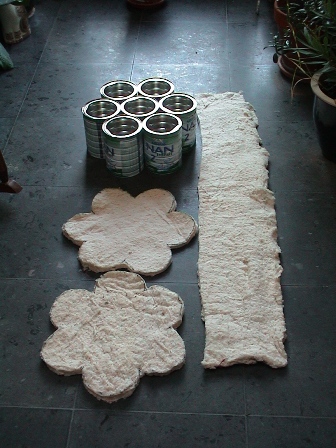
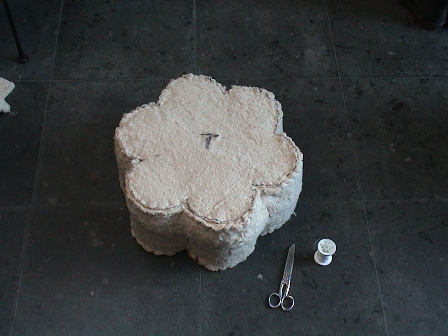
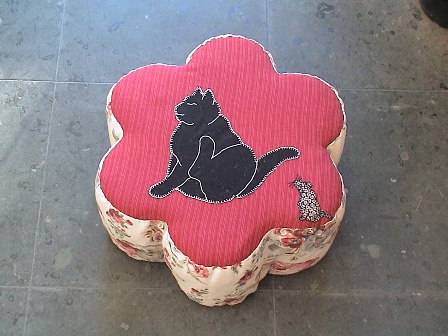
Charlotte, alias Poutitoute, now 16 months old loves to sit down, often arranging a cushion on the floor and carefully backing up to it, and then positioning her bottom on it. I couldn't resist creating her own little "tuffet" or stool, based on a 1930's depression idea used by my great-grandmother, Mama Lee. In her case, she used coffee cans to create the base; for Poutitoute, I recycled 7 of her formula cans, which Papet was kind enough to bolt together.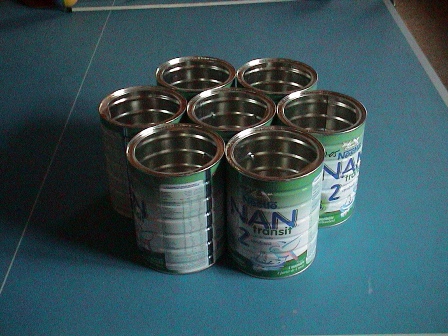
Maggie's Graduation Quilt
April 2007
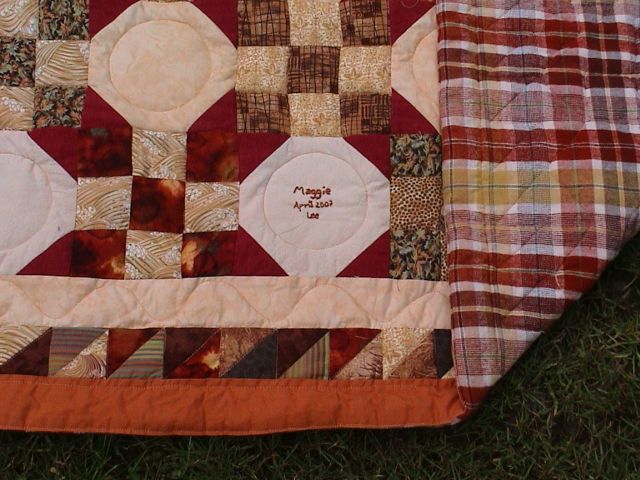
While Maggie was staying with us during the summer of 2006 for her internship in Brussels, I was then working on Barbara and Michel's Snowball Nine-Patch quilt. Maggie really like the design and the colors. When I assembled the quilt for Barbara and Michel, I realized that I had completely miscalculated the number of blocks that I needed, having made far too many. As it turned out, I could make another, smaller versin of their quilt, knowing that Maggie would like it. I could totally surprise her with a special graduation present without having discussed colors and patterns ahead of time. Since I had the blocks already, it went together quite fast. I spent extra time working on the triangle border, which I had not done on the previous version.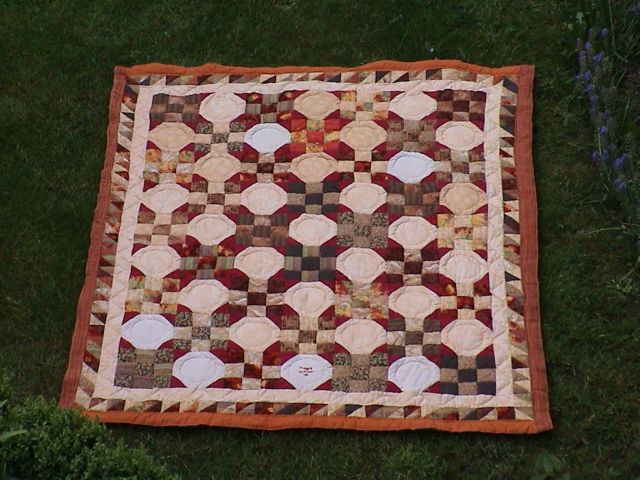
Le Pouf de Nicole
July 2007
A belated birthday gift for Nicole, who requested a pouf like Poutitoute's. It's just the right size to hold an excellent Belgian beer for Nicole's apéro.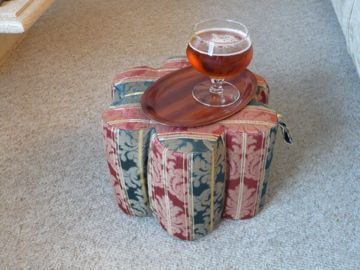
Gingko Oriental Sampler
Dimensions: 110 cm. x. 96 cm.Automn 2007
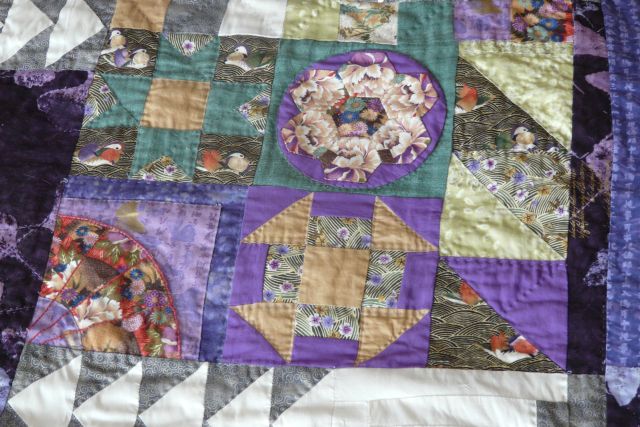
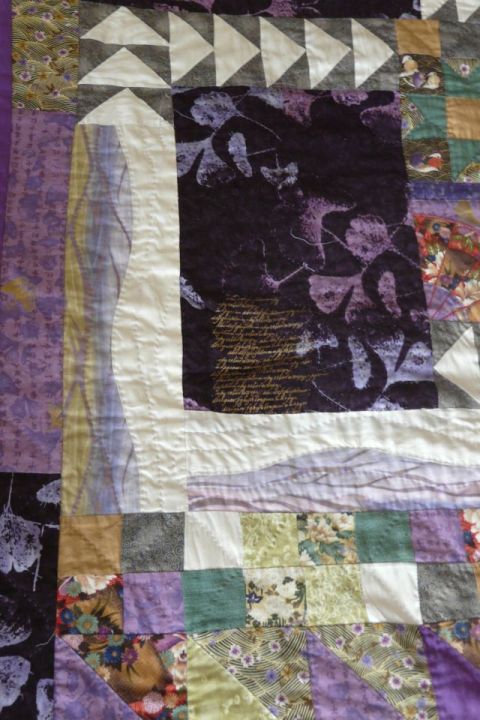
This was adapted from a model in the August 2005 Populat Patchwork magazine which I borrowed from my friend, Gillian. I had some gingko feature fabric that I really liked and wanted to do something "oriental". I couldn't really decide if I liked it or not, and didn't quite know what to do with it when I was finished. It has ended up as a bed rug, greatly appreciated by Aïchat.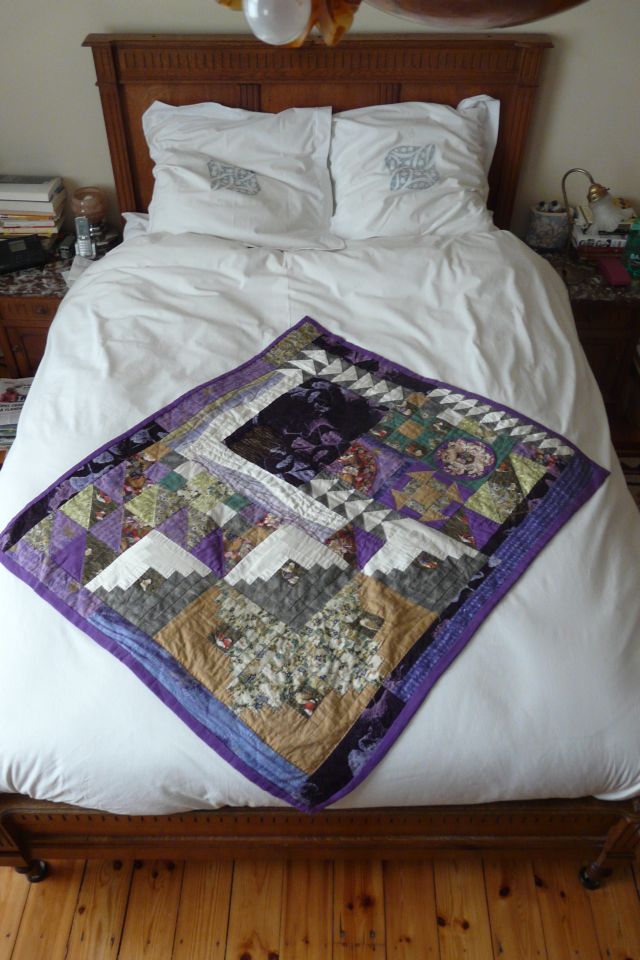
 |
 |
Emilie's First Quilt
April 2008
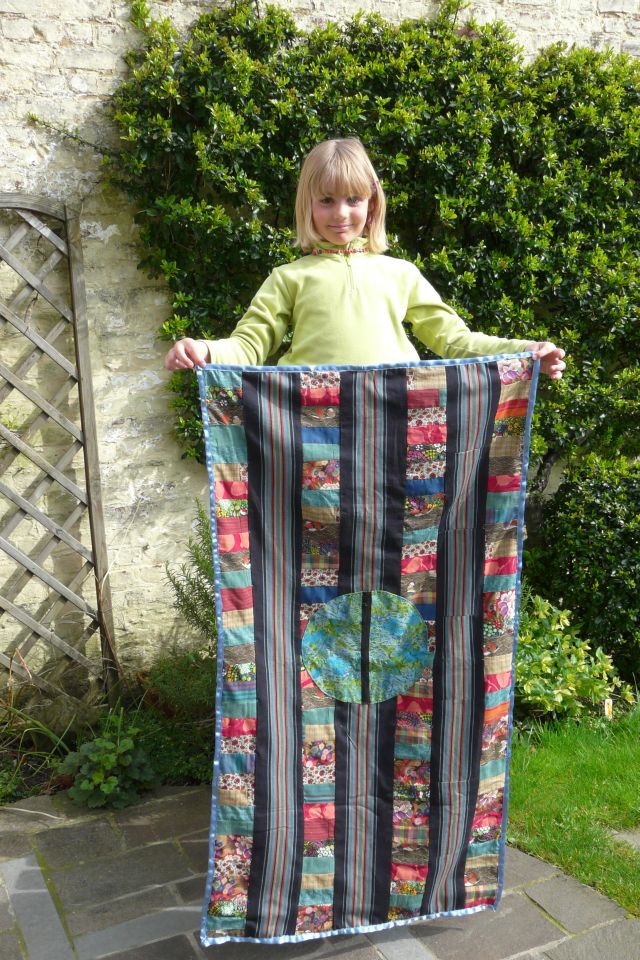
A quick, two-day project to make a quilt for Emilie's stuffed animals, Nono, Nan, Hippopotame, and Boggly-Woggly. Emilie selected the fabric that she liked best from Ali Baba's trunk. We decided on a design, inspired from my new book on African-American quilts. Since Emilie likes to get down to action, we set up a quilt factory.Step 1: Measuring and cutting rectangles with a rotary cutter, and stacking the rectangles in piles.
Step 2: Emilie decides what pieces go next to each other, and I sew them together with the Singer treadle machine.
Step 3: Assembly of the rows of rectangles and the striped fabric.
Step 4: Appliqué of the "jungle" circle.
Step 5: Tying the front to back with yarn.
Behold the proud, beginning quilter displaying her creation.
Knitting Needle Wraps
December 2008
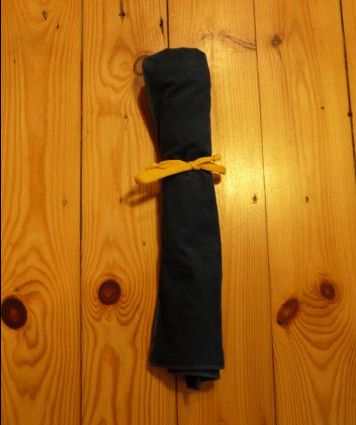
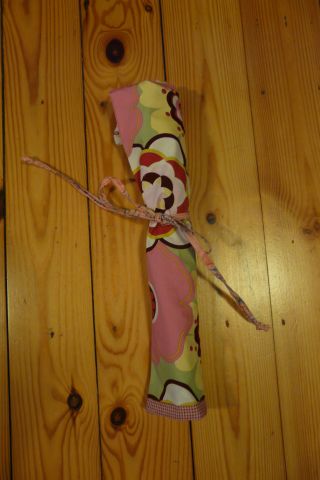
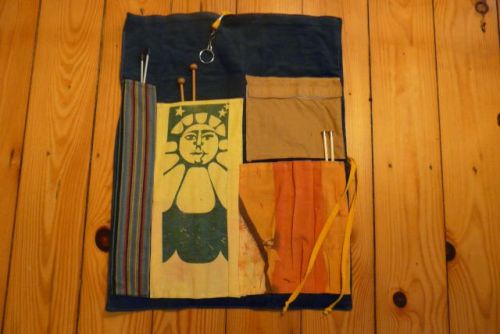
Since both Alec and Madelaine have taken up knitting, I decided to make them each a knitting needle tote that wraps up like a burrito. The blue one features bits of hand-printed or dyed fabric from my P.R. grab bag. It has a velcro pocket for bits.
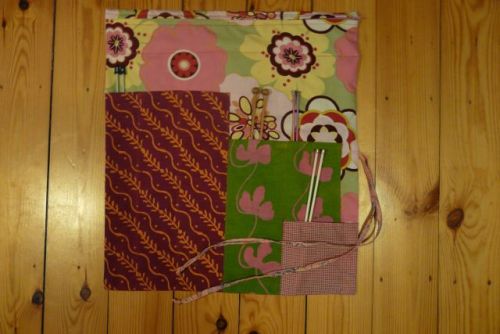
The second features some Indian fabric that Madelaine brought me back from her trip. It has a long zipper pocket at the top for odds and ends.
Ms. Ruby's Housewarming Gift
Dimensions: 87.5 cm. x. 60.5 cm.Hand and machine appliqué, embroidery, quilting
January 2009
A free-hand project inspired by our trip to the US for Christmas 2008, New Year 2009. We began our trip in D.C. visiting Maggie and my cousin, Eddeau, and his wife, Amy. Maggie encouraged us to go to the National Portrait Gallery, which was a fabulous suggestion. I loved the folk-art section. We ended our trip in New Orleans staying at the St. Charles Guesthouse: http://www.stcharlesguesthouse.com/ which had a fabulous staff of folks who had been working there for years. Like characters out of a Eudora Welty novel, there was Laurie Anne, who taught creative writing at Princeton (?); Collin, a graduate student in "social-libertarianism"; Mr. Paul, a migrant bird from the island of Ãland, who works during the winters; and Ms. Ruby, who has manned the breakfast room with her most incredible biscuits for the last 20 years or so.
While I was working on #3 of Ms. Ruby's biscuits, she told me that she had just received her new home, after having lost her home during Katrina. She has a new house in her old neighborhood, and she hopes that Katrina will have washed out those "dope peddlers".
She told me how she loved to garden and how she was going to be so happy working in her new garden. Didn't have much for furniture. I wanted to explain to her about "on-line trade/flea market sites", but didn't exactly know where to begin.
I just kept thinking about Ms. Ruby, her fantastics biscuits, and her new home and wanted to make a house-warming gift for her.
And this is it.
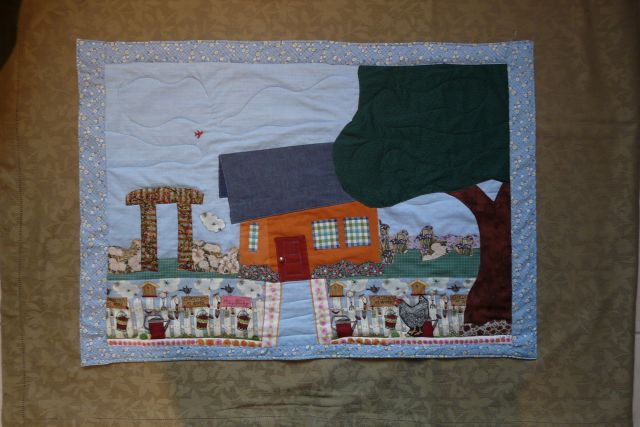
Welcome home, Ms. Ruby
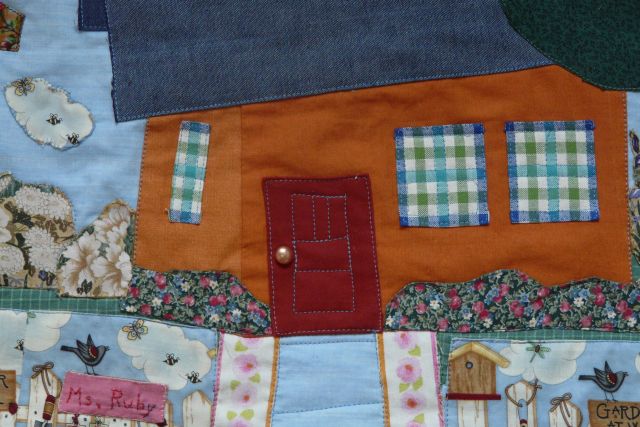
Front Door
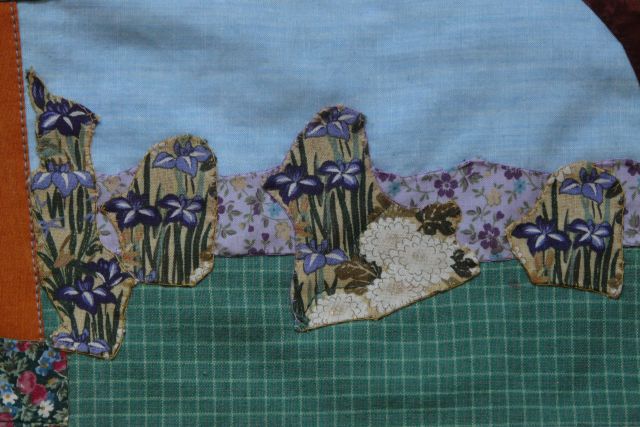
Iris garden
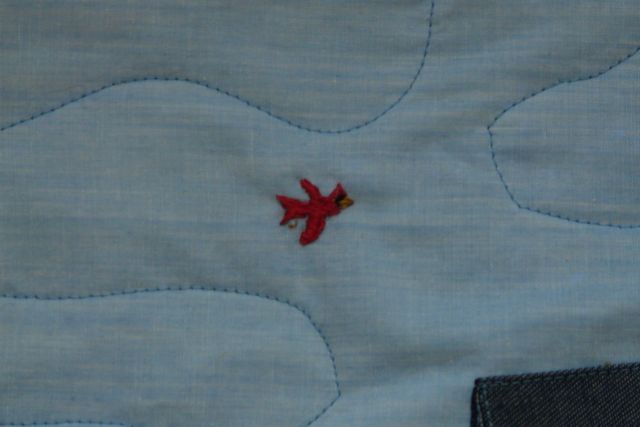
Cardinal close-up
Victoria and Jean-Louis's Wedding Coverlet
Dimensions: 173cm. x. 145 cm.Hand and machine embroidery, quilting
Fall 2007 - February 2009
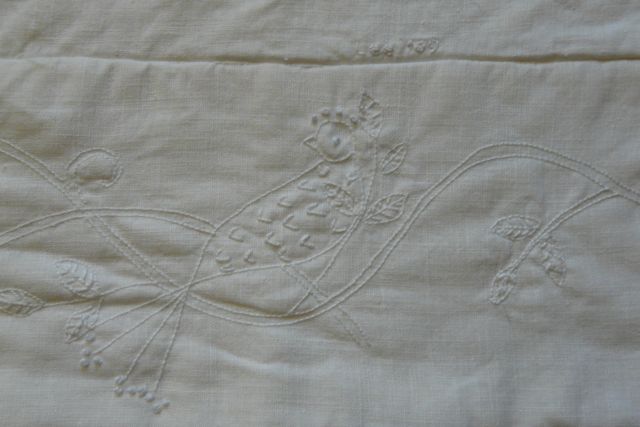
Since I was invited to be a witness at Jean-Louis Gravier and Victoria Robertson's wedding in Dinant, October 16, 2007, I wanted to make them a special wedding present. Victoria was struck by the model called "histoire d'amour" from patchworks, quilts & cie (Marabout D'ficelle).This is a white on white creation, featuring both machine and hand embroidery on white linen, with a white cotton backing. The filler is 50% cotton and 50% bamboo -- a real delight to work with, very light and easy to the needle.
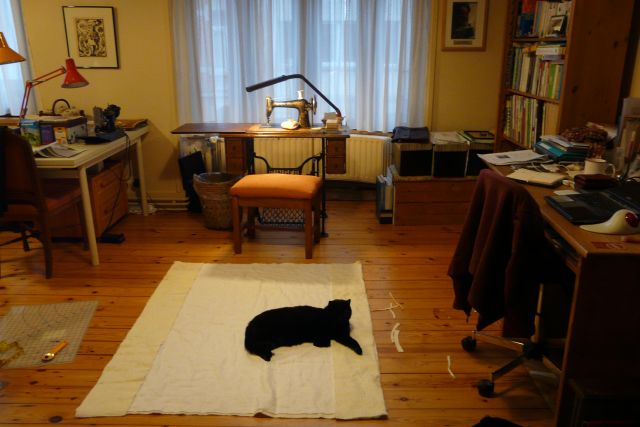
It's a bit hard to photograph white on white, so I'll just show you how Moïse was eager to help and the details.
Katie Cook's Wishlist Quilt
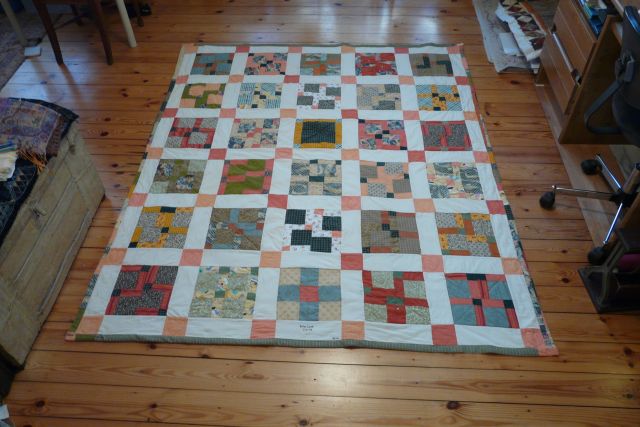
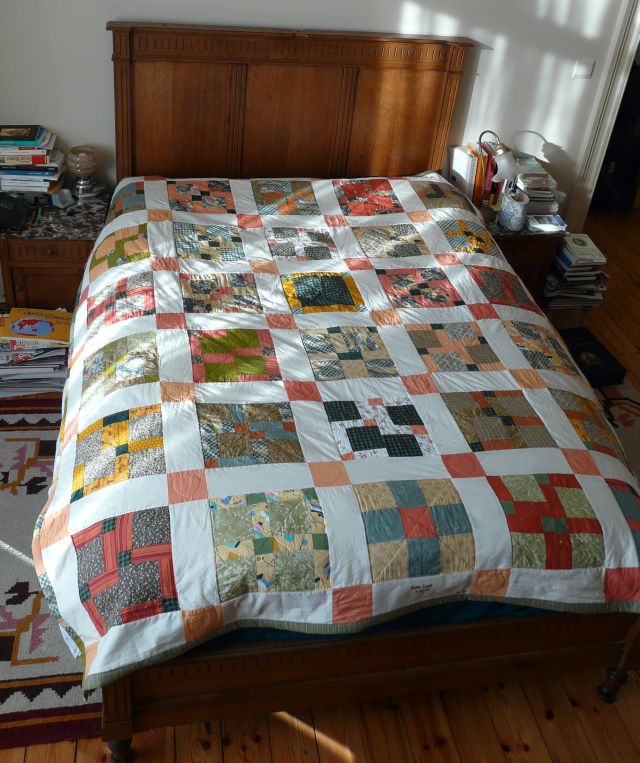
Dimensions: 170 cm. x 205 cm.Machine piecing and quilting, hand finishing
Summer 2009 - Fall 2009
I met my second cousin, Katie Cook, after having hooked up with her dad, Chuck, my long-lost first cousin that I hadn't seen since I was 7 years old (just nigh on 50 years ago.) He SO reminded me of my brother, Butch, and Chuck's best all-time play-mate during the Saltillo years when we visited our paternal grandparents at summer and Christmas vacation. Katie and her brother, Greg, were a delight to meet and I have since been trying to keep tabs on Katie via Facebook. My attempts to persuade her to downsize for her gaz-guzzler were futile, but I hope to sew a few green seeds her way. So anyway, I discovered this famous "30's list" that Kate was working on and discovered among the daredevil tomfooleries, a desire for a quilt. Right up my department, so I volunteered. Here's the sample patch that I sent for pre-approval.
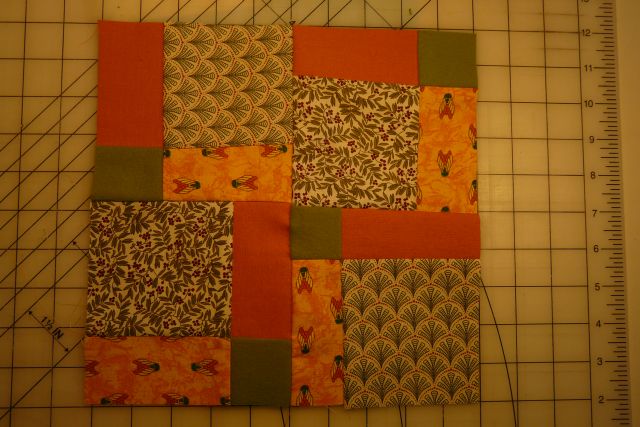
Sample block Nine Patch
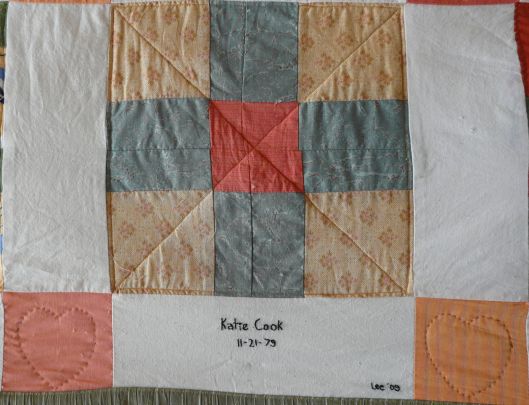
The trick to the Nine Patch "hacked" is that you start with a regular nine patch, 3x3, with a strong central color. Once it's completed, then the block is cut in half both lengthwise and crosswise. Then the four little squares are re-assembled to give a more "patchy", less symmetric feel to the overall pattern. It's starting to look so cute now, that I'm going to have a hard time parting with it. If Bauer pees or poops on it just one time, I'm taking it back! This pattern is all about calculated chaos. What you see is not really what it was to begin with. Think about it...
Initial layout
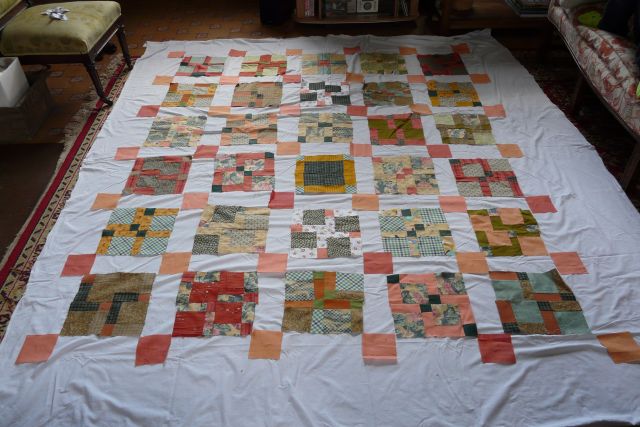
Finished product
Bedsize view
Signature
Hearts and Crosses Quilt
Appliqué, machine piecing and quilting
December 2009 - January 2010
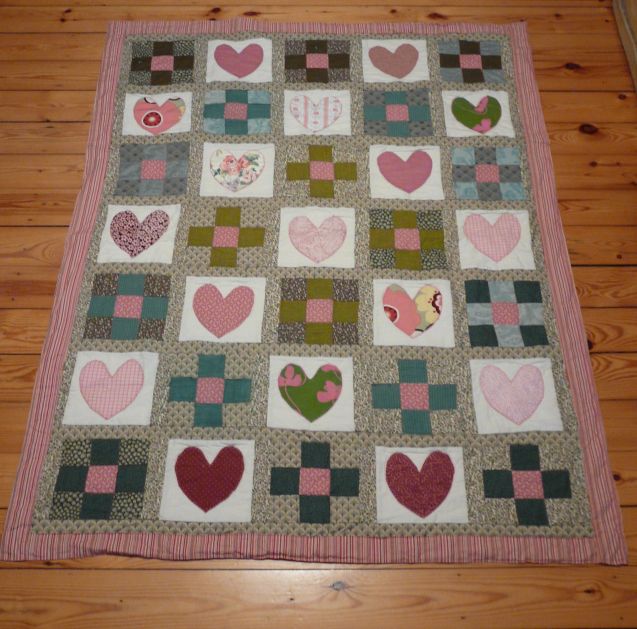
Quick to assemble, this quilt for a friend’s much awaited baby, Ielena, is based on alternate nine-patch cross blocks and appliquéd hearts. The pink and green scraps work well together making it feminine but not too girly.
Metamorphosis Quilt
Appliqué, Crazy cut piecing with crazy quilt embroidery, machine quilting
January - March 2011
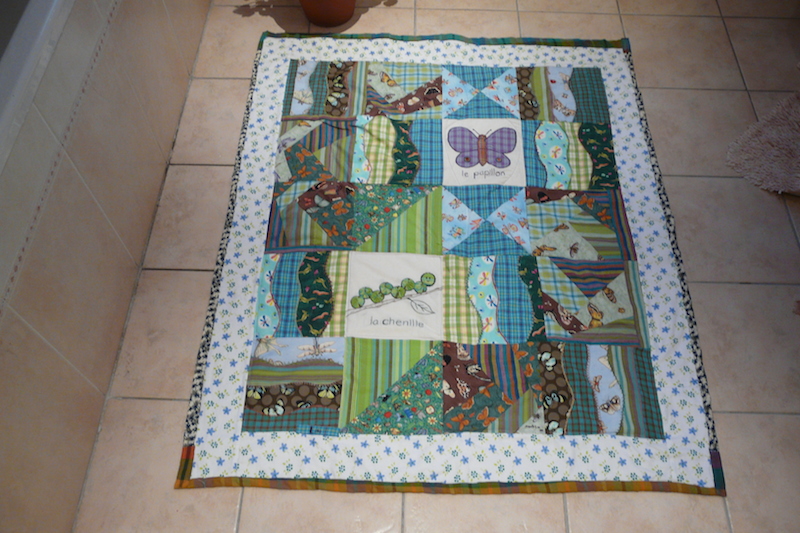
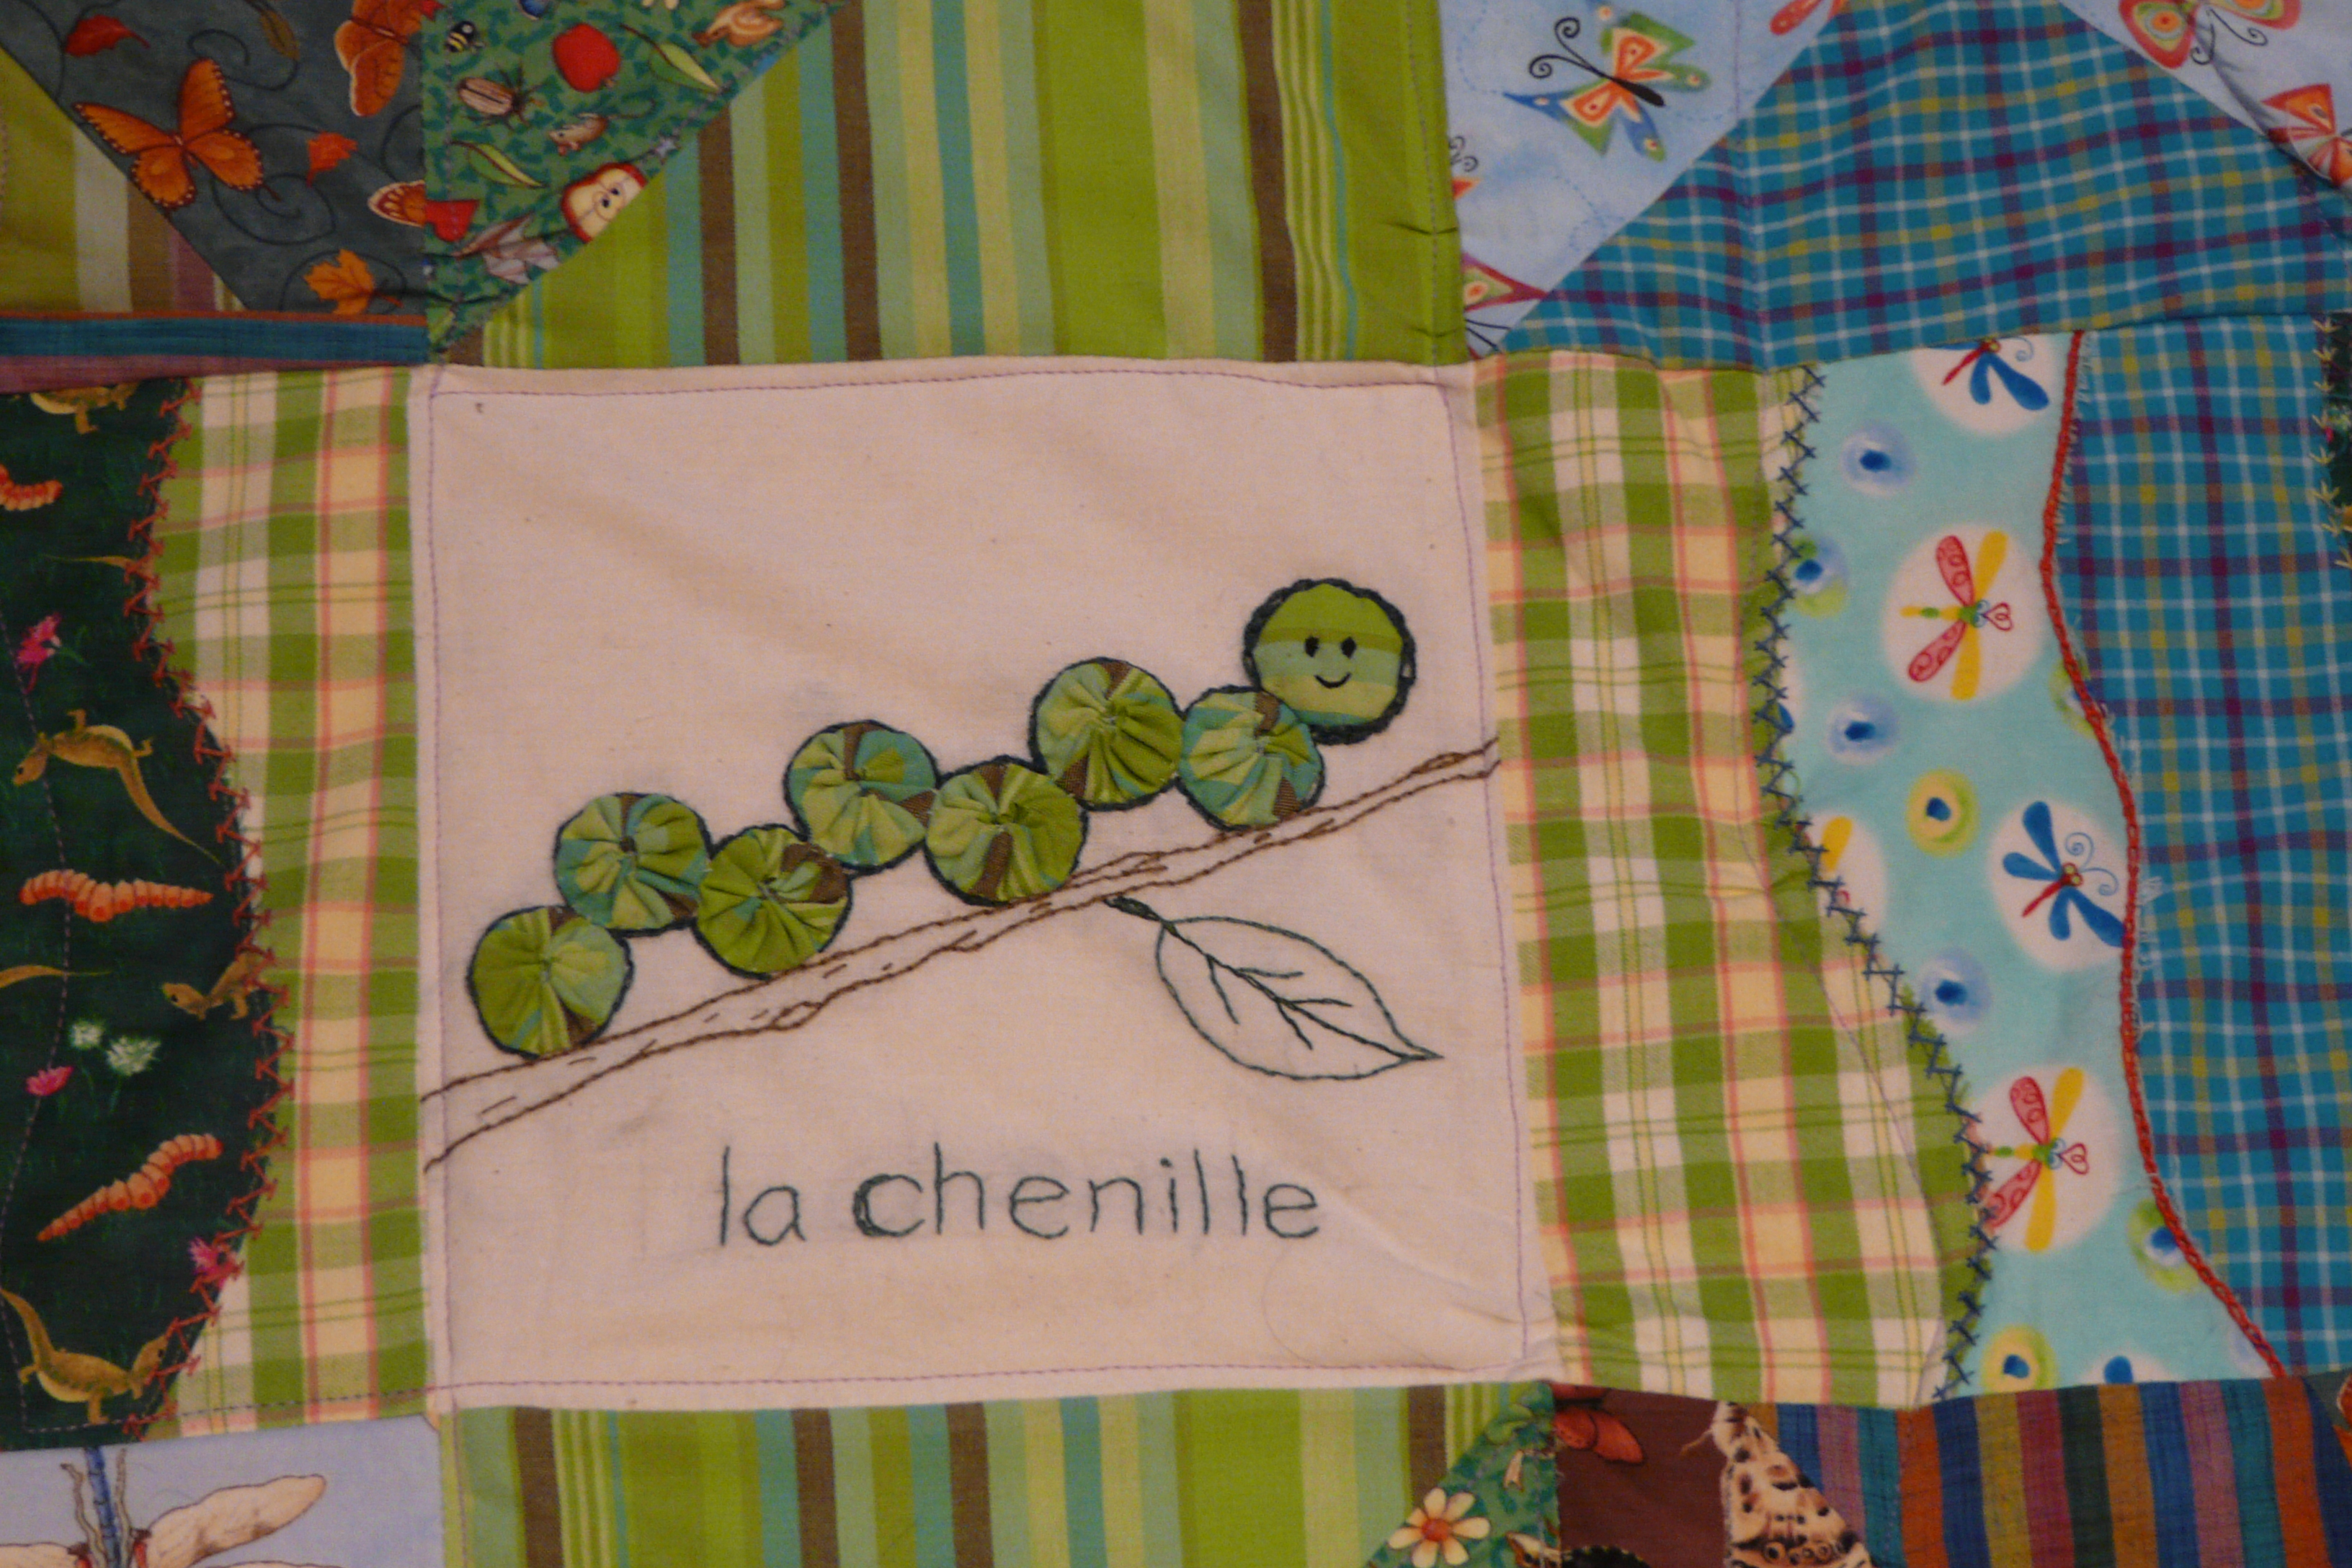
For Lola’s crib quilt, I focused on a butterfly theme including many fabrics with butterflies or other bugs. The two appliquéd patches feature "le chenil” (the caterpillar) who is made from yo-yo’s and "le papillon” (the butterfly). As a baby, Lola loved to put her finger on flowers and tiny bugs in fabric. This quilt was made especially with her attention to detail in mind.

Bee Happy Quilt

description
description
description
description
description
description
Page compiled by:
Lee Anne Morgan
rue du Tournoi, 16
1190 Bruxelles
Belgique
description
description
description
Page compiled by:
Lee Anne Morgan
rue du Tournoi, 16
1190 Bruxelles
Belgique
description
Lee Anne Morgan
rue du Tournoi, 16
1190 Bruxelles
Belgique
